DIY Guide To Fabricating your own Front Panels for Electronics
First Posted June 5, 2016
Updated Aug 23, 2016
Making a nice front panel for your electronics project has always been
a pain in the neck. Generally, we end up with something that is
not very nice looking if it is a total DIY job, or, if you use one of
the online services, such as Front Panel Express, you can end up paying
a lot of money. Although, I have to say, I really like the panels
I had made at front panel express, I am on a considerably tightghter
budget thise days. The method I am going to outline here, is , in
my opinion, a very straight forward and easy way to make a pretty nice
looking panel. But it is not the only way.
If you do a google search you will find out there are many
techniques. You may like one of the other ones better. Here
are a short list of some of the more common methods used to create
front panel artwork.
1. NC Milling. Very much an option these days with the availability of inexpensive NC routers.
2. Silk Screening. Yep, you can silkscreen at home. To me,
this looked kind of messy. But, with practice, you can get
extremely good results.
3. Pinting on Paper and then glueing it to the panel.
a. Use contact cement or some other adhesive to glue the paper to the front panel.
b. Laminate the paper first, then glue that to the front panel.
4. Magic Marker on paint.
5. Print on a clear adhesive film (Avery Lable) and then stick that on the panel.
6. Dry tansfers on Paint.
And, I am sure, there are others.
The methode I am going to show you is catagory 3 (Print on Paper), but
we are going to laminate the paper onto the aluminum panel using a low
viscosity Epoxy.
You will Need:
1. A printer. Color printers are nice. Inkjet or Laser will
work just fine. The epoxy will not affect either the ink or the
toner.
2. Hobby Knife (XActo #11 blade is my favorite.)
3. A way to make holes in an aluminum panel. You can do this any
way you want. If you have a Whitney Punch, by all means. If
you have a drill press, knock yourself out. I happen to use a
Mill-Driull. The reason for this is I have extremely limited
eyesight, so I cannot align the drill up with a mark on the work, so I
use the X-Y table to get the holes drilled where I want. This
also means that I need to clamp the work down to the table.
4. Some 220 grit wet/dry paper (I use the stuff that is black), and a sanding block.
5. Dishwashing Detergent.
6. A use once paint brush. 1/2 inch. It is going to be use
once weather you like it or not, because I have no idea how to clean
epoxy out of the brush.
7. K&B Clear SuperPoxy.
8. K&B 1 oz measuing/mixing cups.
9. Dixie cup to mix epoxy in.
10. Paper.
11. Vector Graphic Program (FrontCad)
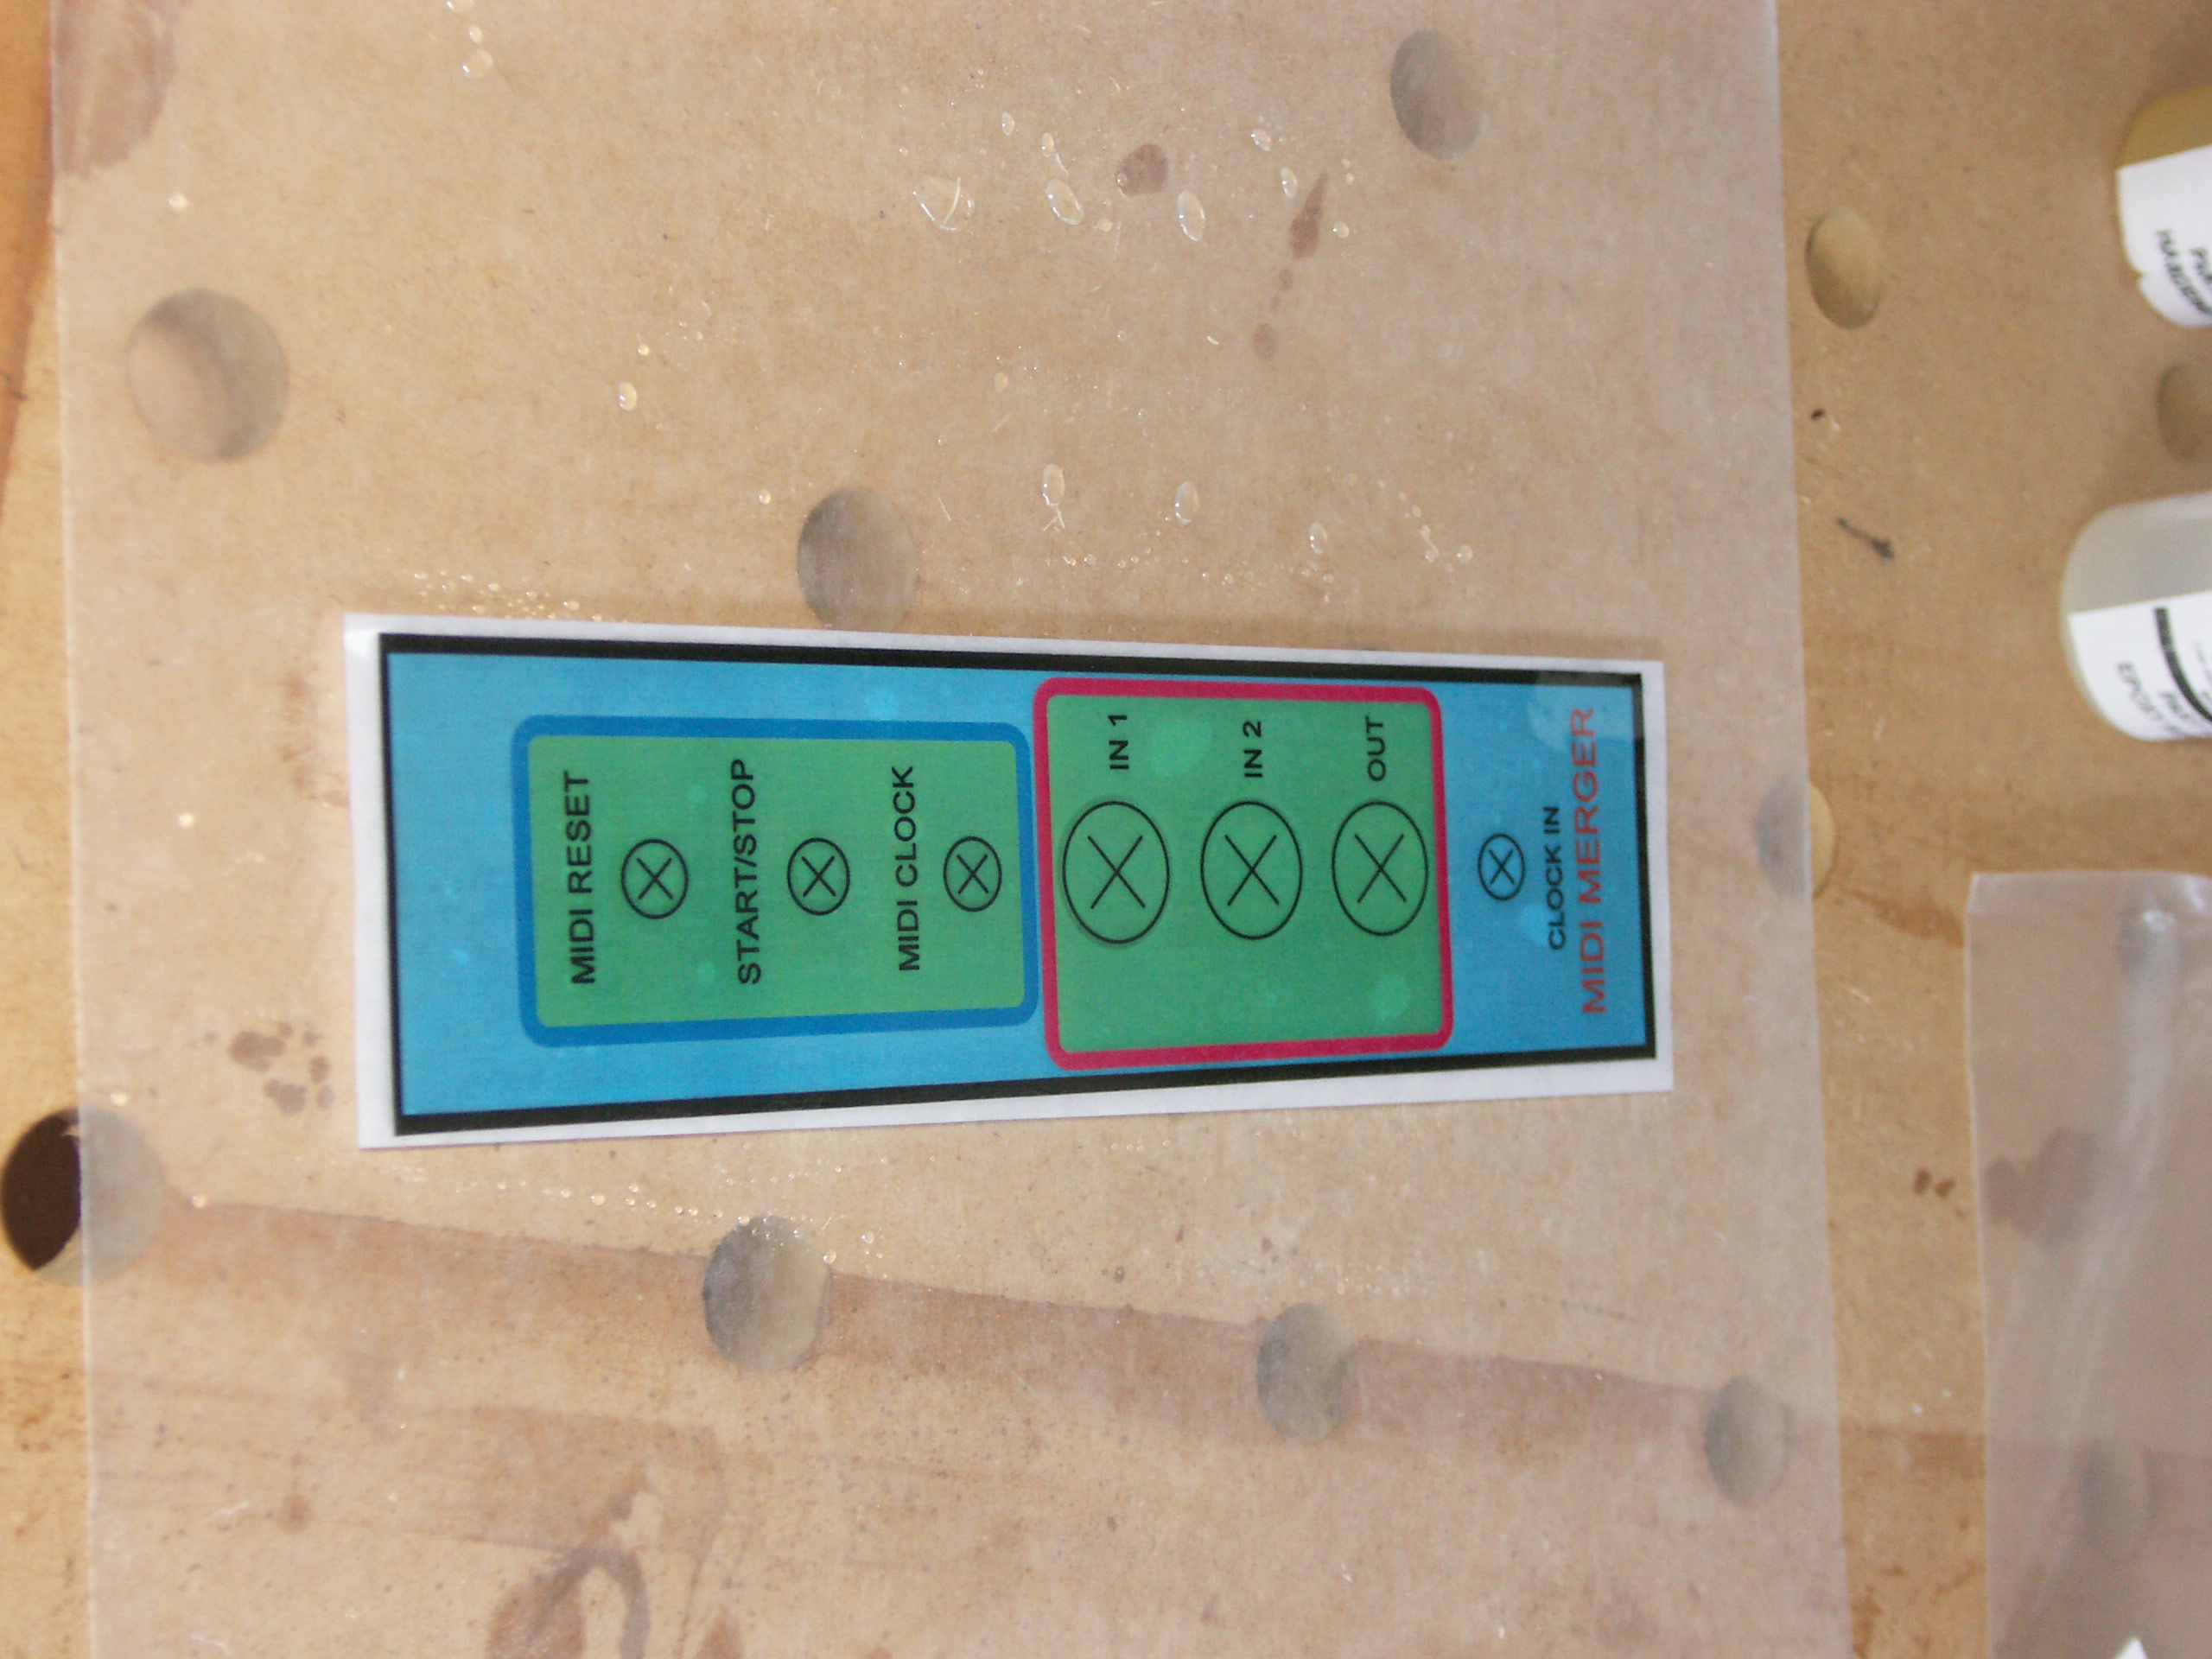
So, the first thing you need to do is design a front panel.
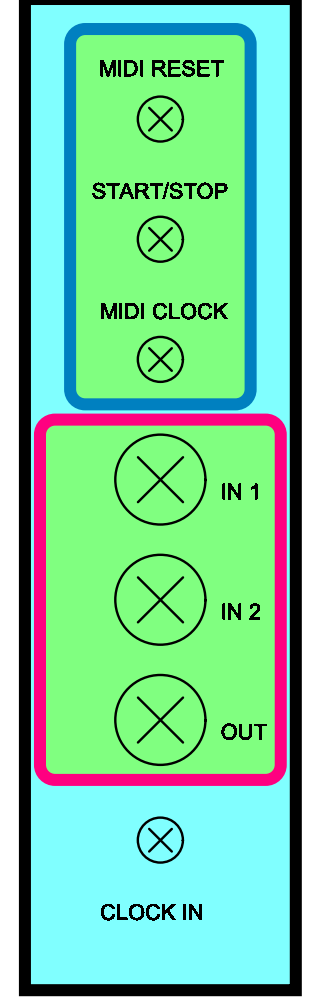
This is the panel I created for this demo, and will be used for a Midi
Merger Module I designed. This is a 5U panel, 2.25" x
8.75". Once you have your panel design the way you want it, it is
time to print it out.
The next thing to do is to drill the holes into the panel, or, if you
have a punch, punch the holes in the panel. If you are going to
be drilling the holes, I would like to recomend a brad tipped
drill. Now, strictly speaking, these are for drilling wood.
But if you are drilling aluminum, they will work just fine. The
reason for a brad tipped drill is that it will drill a perfectly round
hole into sheetmetal. If you use a regular drill to drill into
sheet metal, you will notice that the hole comes out sort of oblong
shaped.

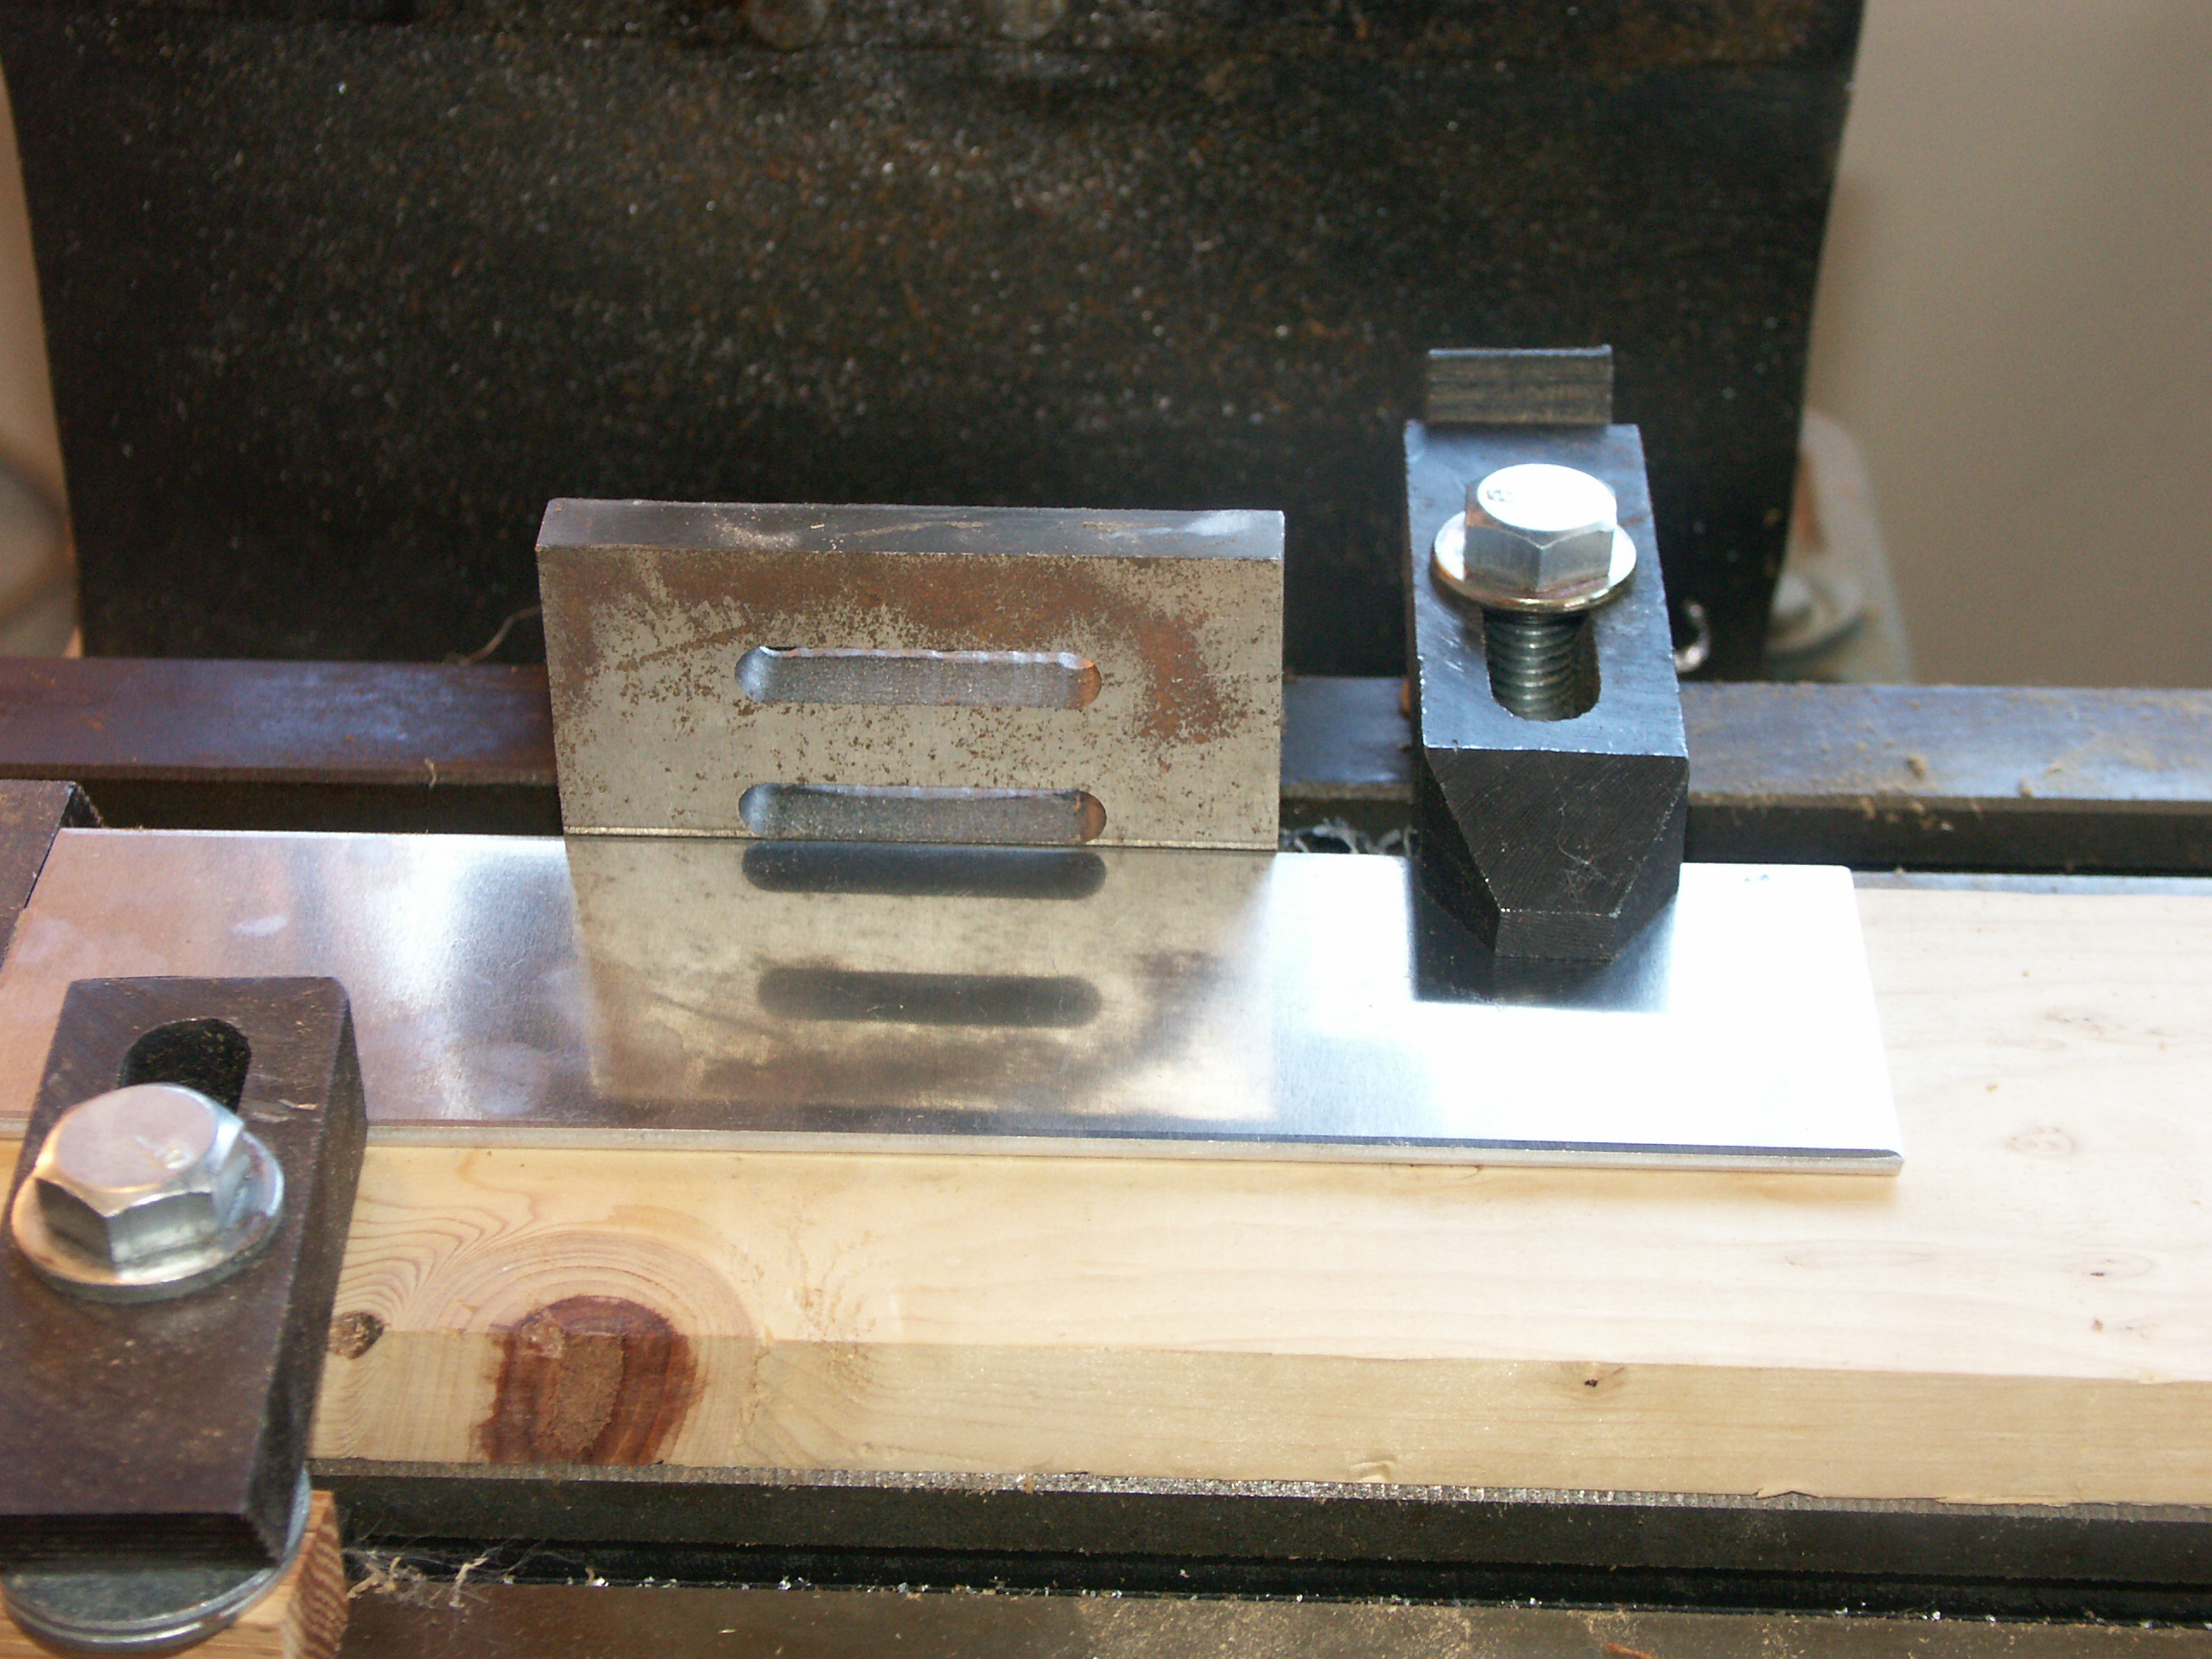
Below, you will see how I set up to drill the holes in the panel.
I use a right angle jug that I clamp down to the table. I use a
dial indicator to make sure that it is square to the quill. Once
I have that square, then I use a square to make another clamp at right
angle. This is to the left. Then I find a flat piece of
wood and on top of that the panel. I then clamp then down to the
table making sure that the panel is firmly in the corner of the jig I
have created.
Then using an edge finder, I locate the edges of penel, and zero the
cranks on the table. You will also need to remember to compensate
for backlash when you are moving the table around.
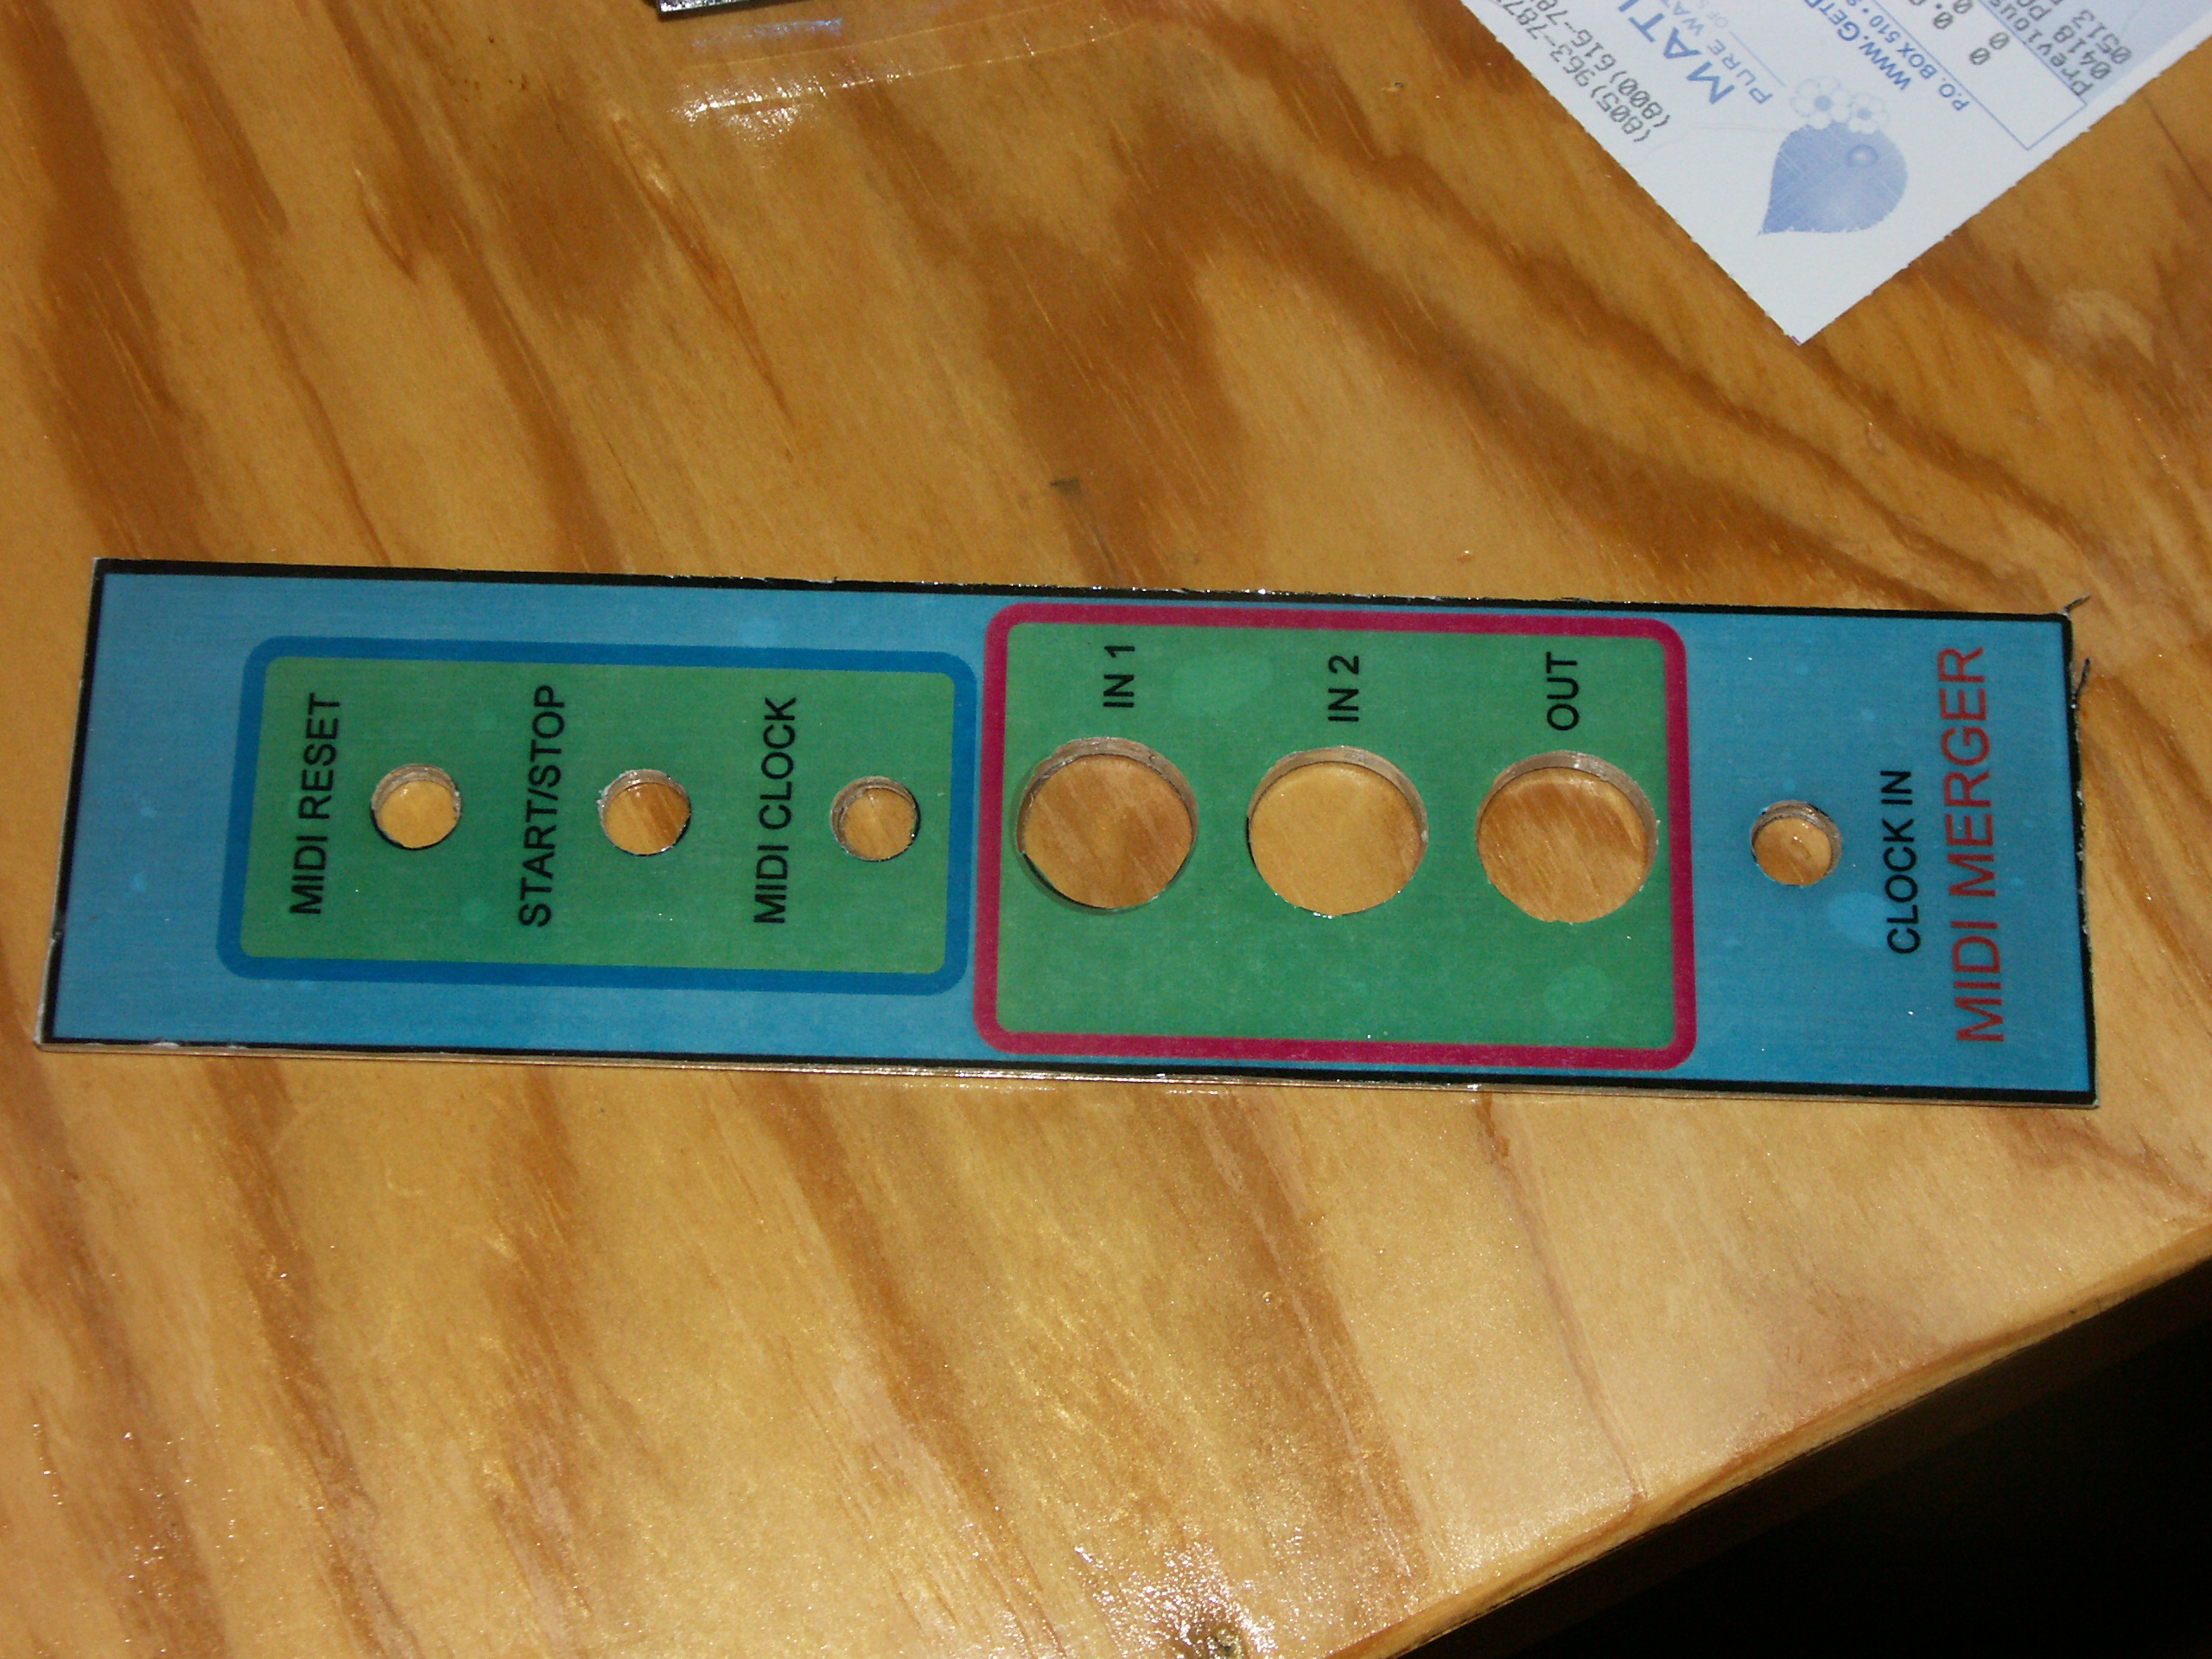
So, make the holes in the panel. When you are done, remove the panel.
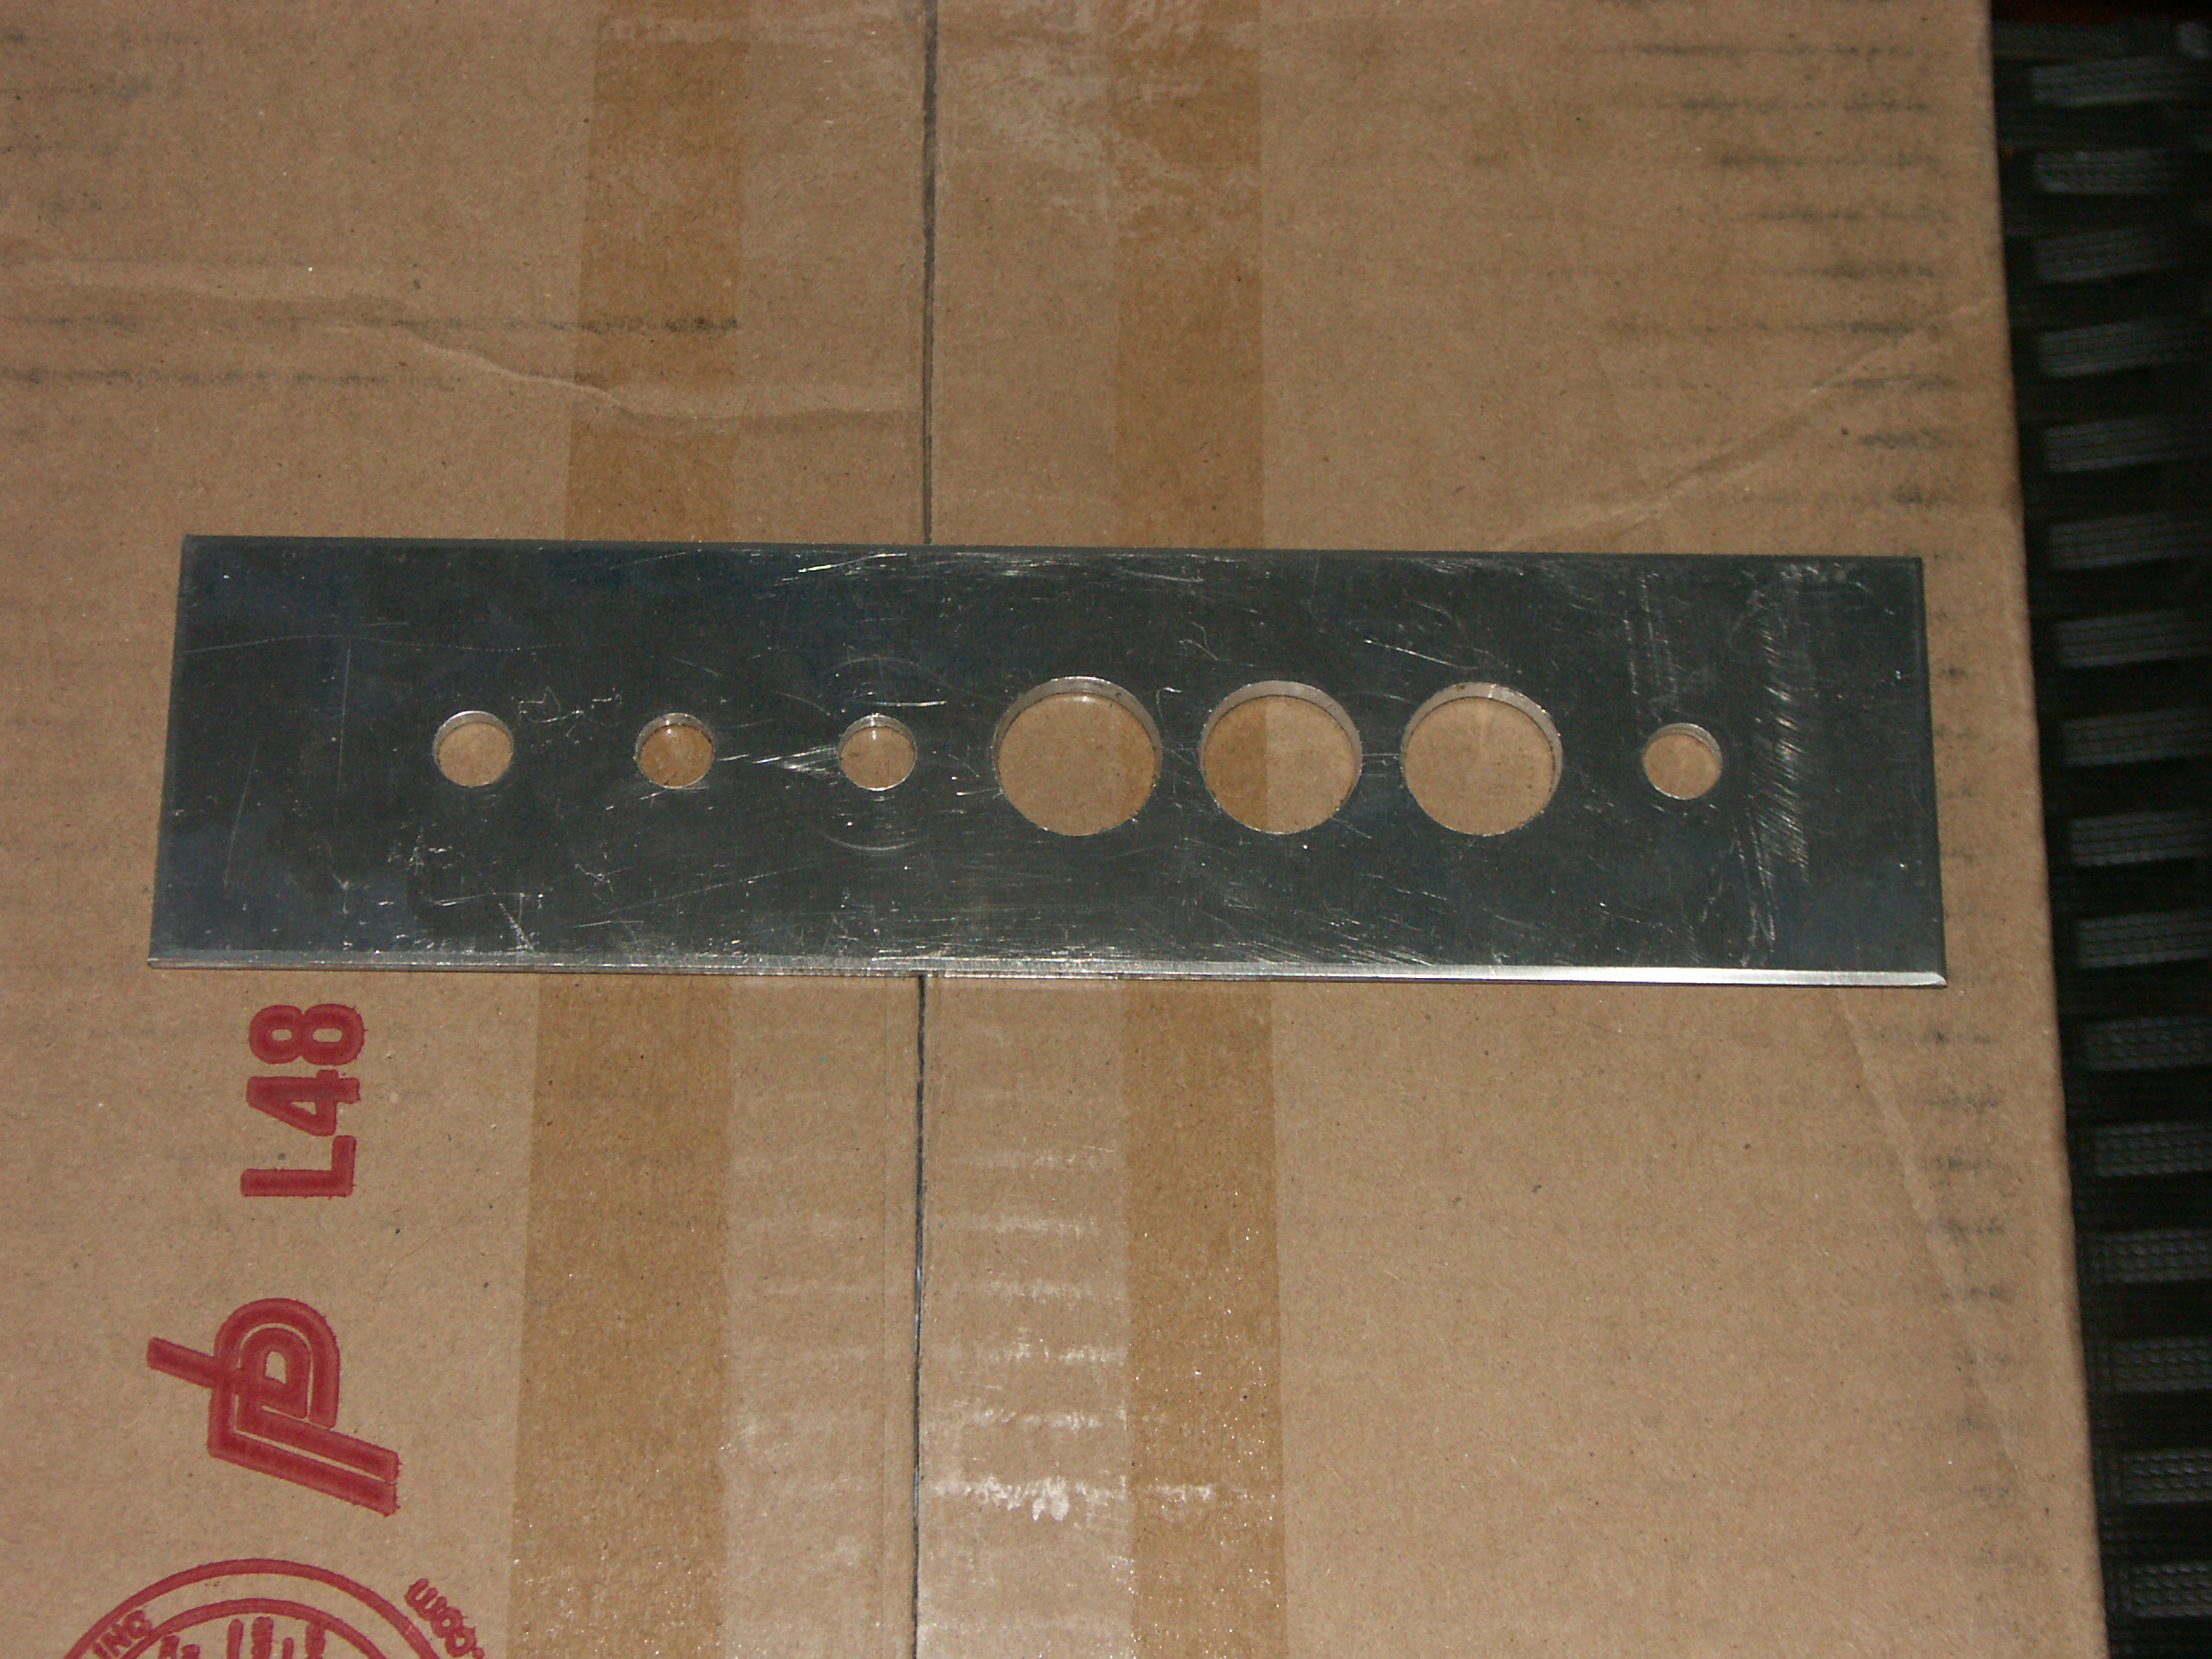
This is what my panel looked like after I was done drilling.
Before you go any furnter, in other words, before you spend any more
time working on the panel, make sure that the holes are where they need
to be by test fitting the panel to the PC Board.
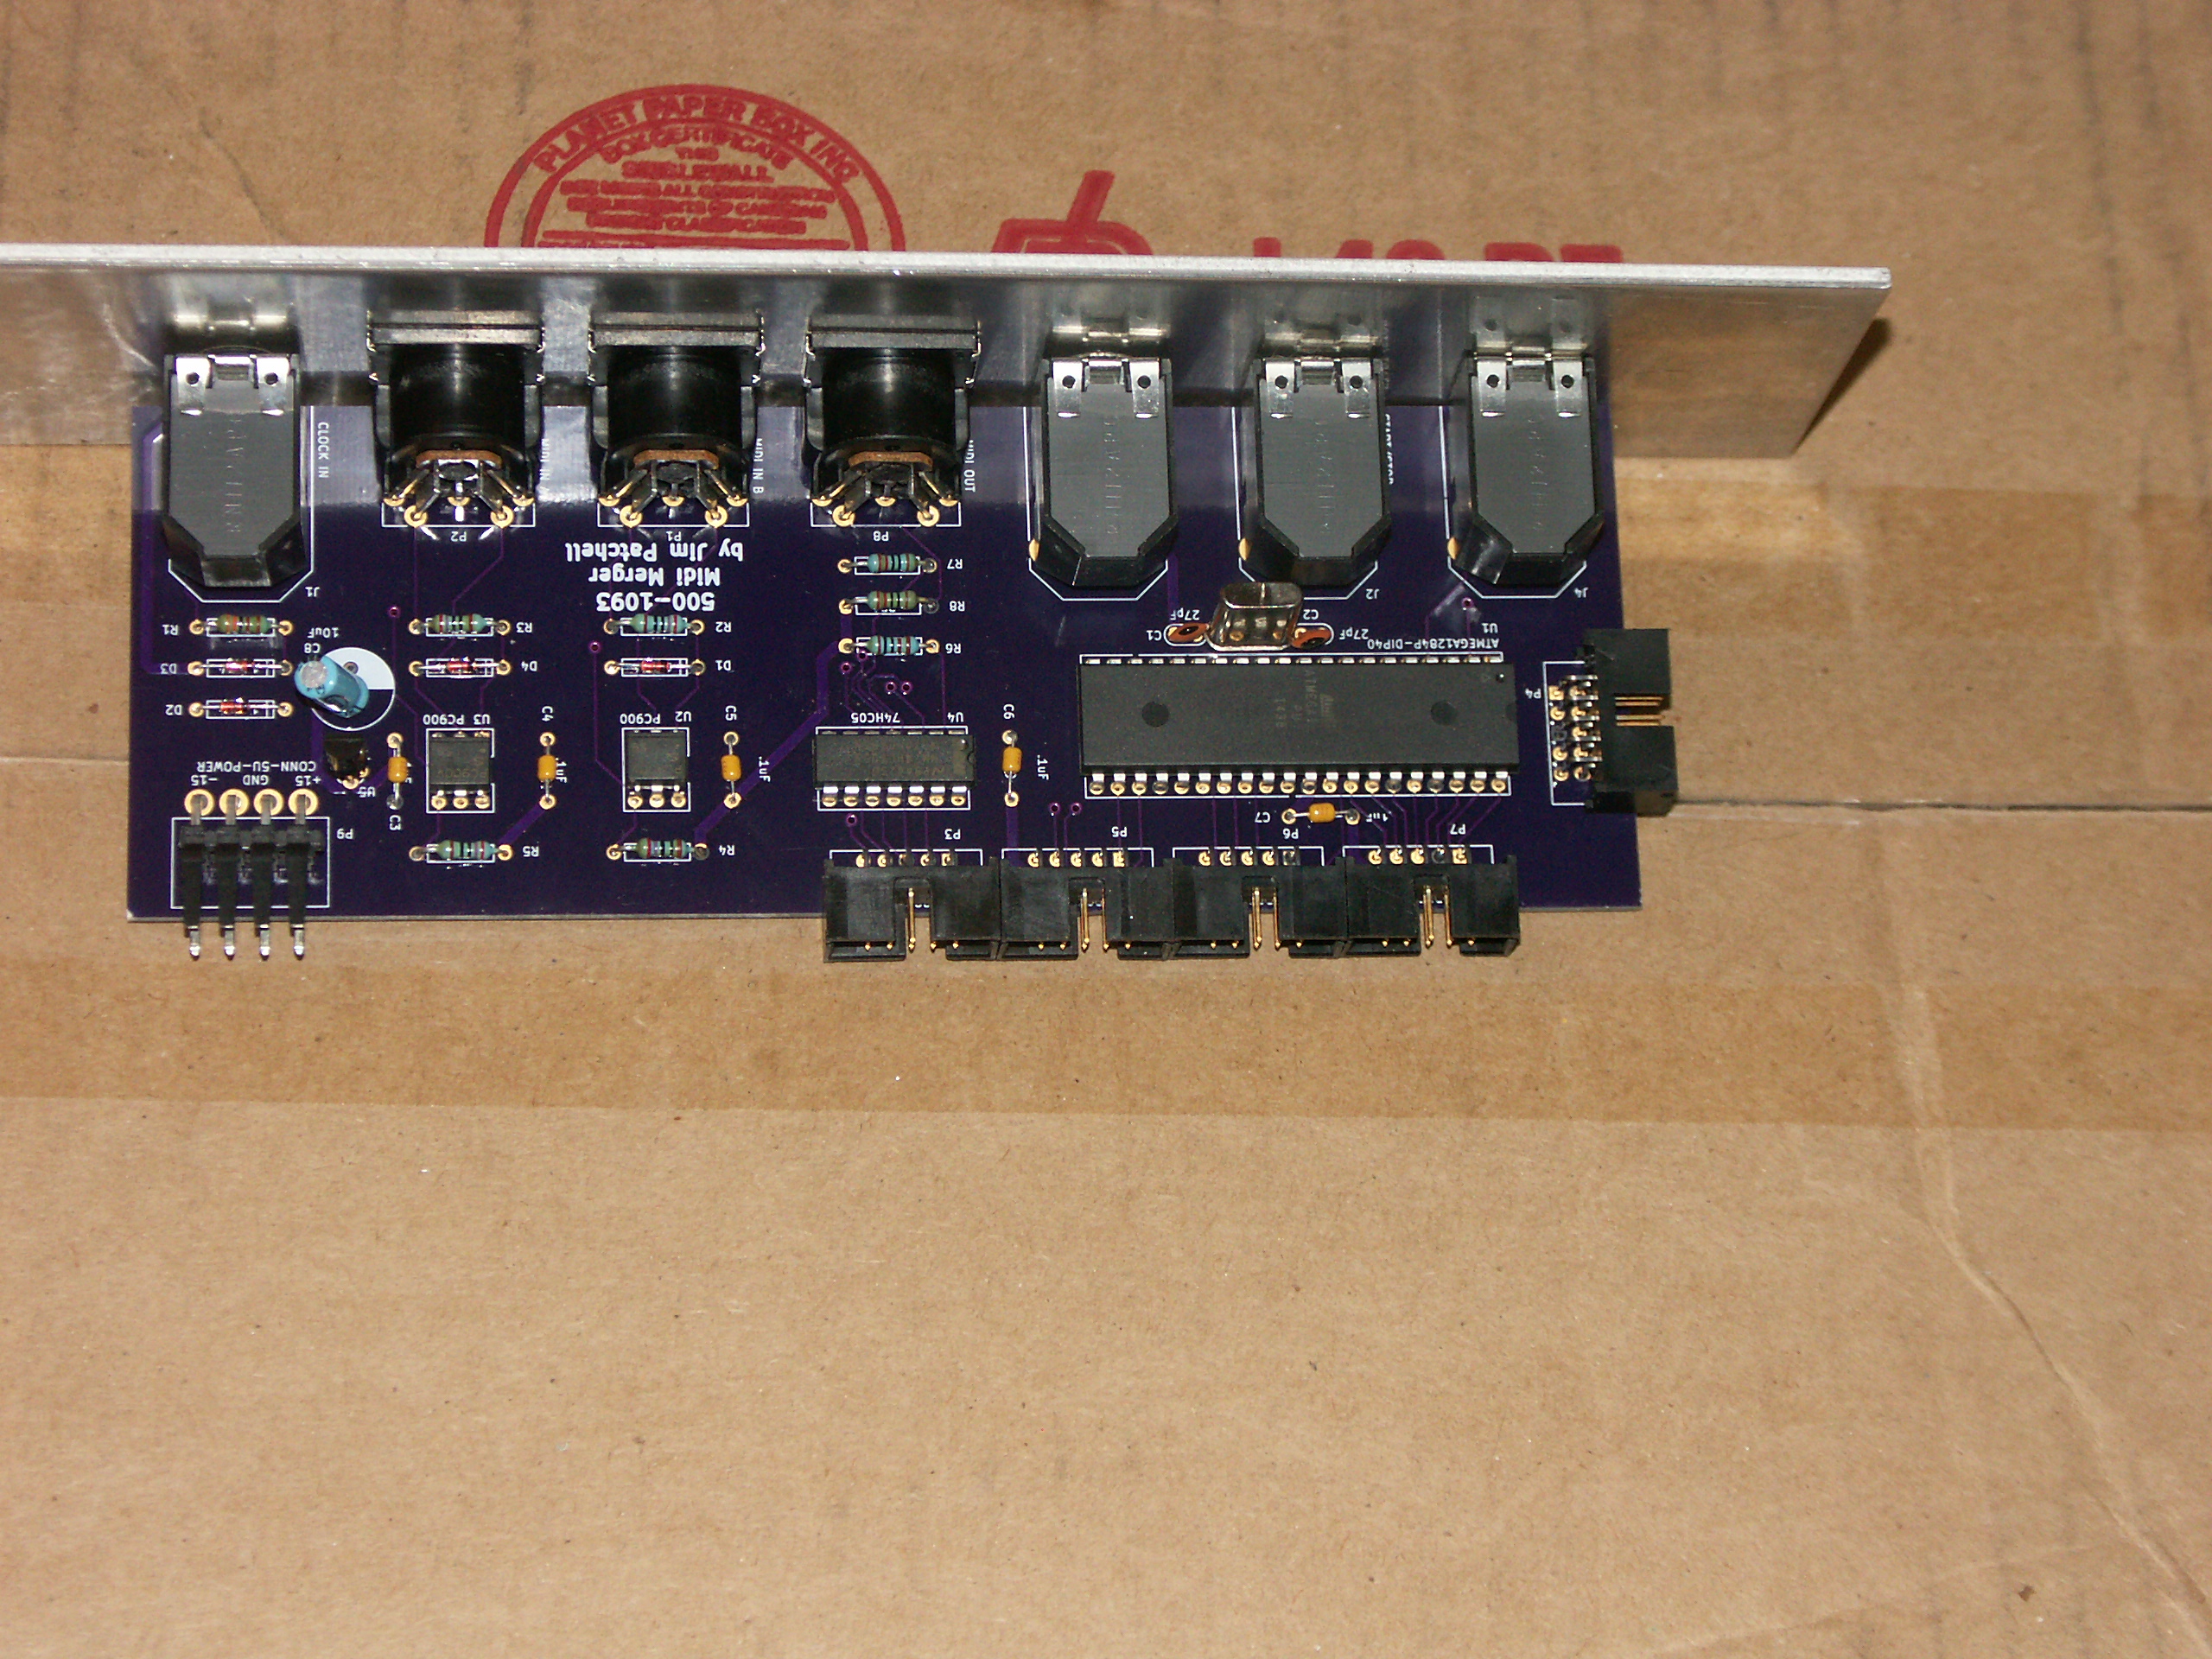
If all is good, then proceed. Otherwise, go back to the drawing board. :)
Put the 220 grit wet/dry paper in a sanding block and clean up both
sides of the panel. This removes burrs and scratches. And
the 220 grit will also leave a "tooth" in the panel that will help the
epoxy adhere to the panel. Now we need to thoroughly wash the
board. Dishwasher works good for this, but, if you have a fussy
spouse, hand washing works good. Be sure to use Dish Detergent to
wash the panel. Soap will leave a greasy film that will prevent
the epoxy from bonding. Make sure that the panel is perfectly
clean. After the wash, wiping down with Denatured Alchohol is a
good idea. Also, at theis point, I wear rubber gloves to keep
skin oils off of the metal.
When the panel is dry, mix up some K&B SuperPoxy. This stuff
is pretty runny. Now, while it is not really all that fussy about
the proportions, do try to be as exact as possible. This is why
you should use the K&B measuring/mixing cups to make sure you get
exactly 2 parts resin to 1 part hardener. And you do not need a
lot, but enough so you can get it on that 1/2 inch brush.
Make sure that you have the correct side of the panel facing up.
Also, place wax paper under the panel. The epoxy goes everywhere,
and it is strong. You do not want to glue your panel down to the
dining room table. Trust me, your wife will not apreciate
this. Paint a coat of epoxy on the back of the paper sheet.
Place the sheet of
paper on the panel. Make sure there are no air
bubbles. I use a cheap squeegee that I run over the
top of the paper to work out any air bubbles. Then
pick up the panel and make sure that the paper is correctly
aligned. If you have some sort of a light table, which can be
just a piece of glass with lights under it, this is a much better way
to do it. Place the panel back on the table and put a coat of
epoxy over the paper. Do this gently, so as to not cause the
paper to slide.
It takes several hours for the epoxy to harden. When it does, you
will have a nice glossy finish. Generally, if you mixed the epoxy
in the proper proportions, it will harden in about 3 hours. It is
at this time that it is easiest to do your trimming. In 24 hours,
the epoxy will be fully cured.
We now need to clean up the panel a bit. Start with the
edges. Use a fresh Xacto #11 blade to trim the excess paper from
around the edges. When you cut, move the blade from the front of
the panel to the back. This will, hopefully prevent damaging the
paper. After the edges are cleaned up, do the same for the
holes. besides removing the peper, you will also need to clean
out the excess epoxy that ran into the holes. This will prevent
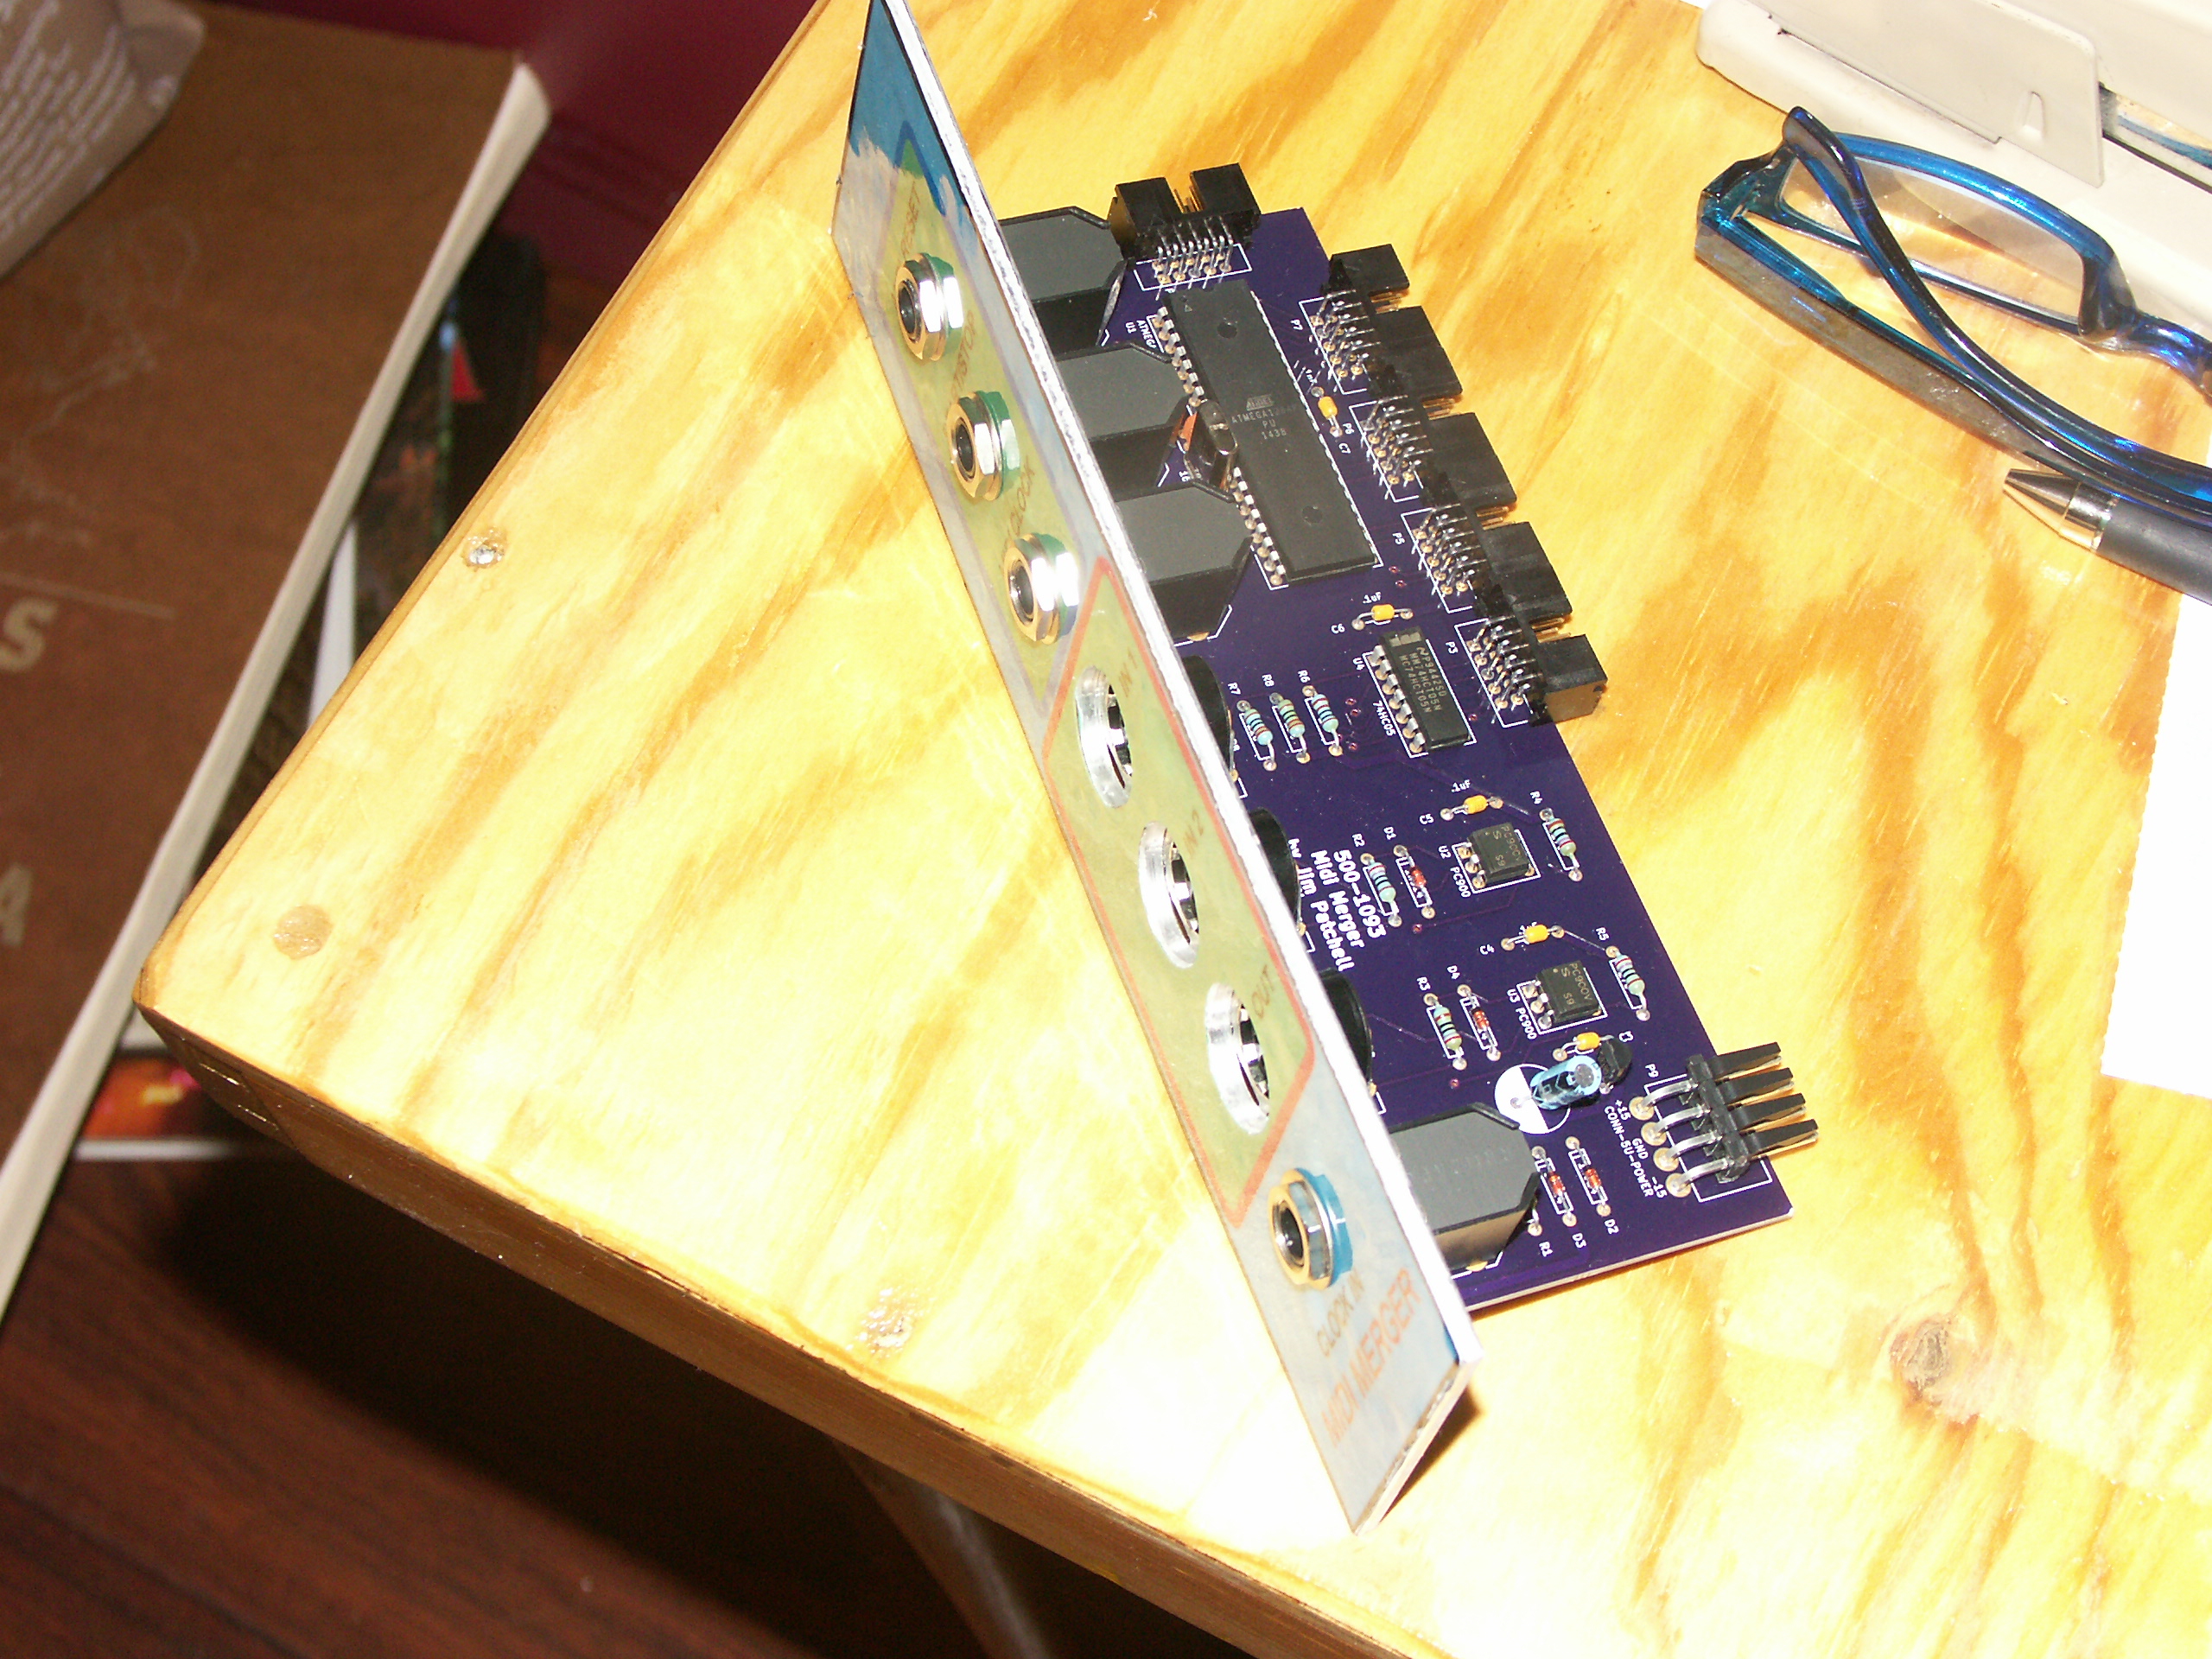
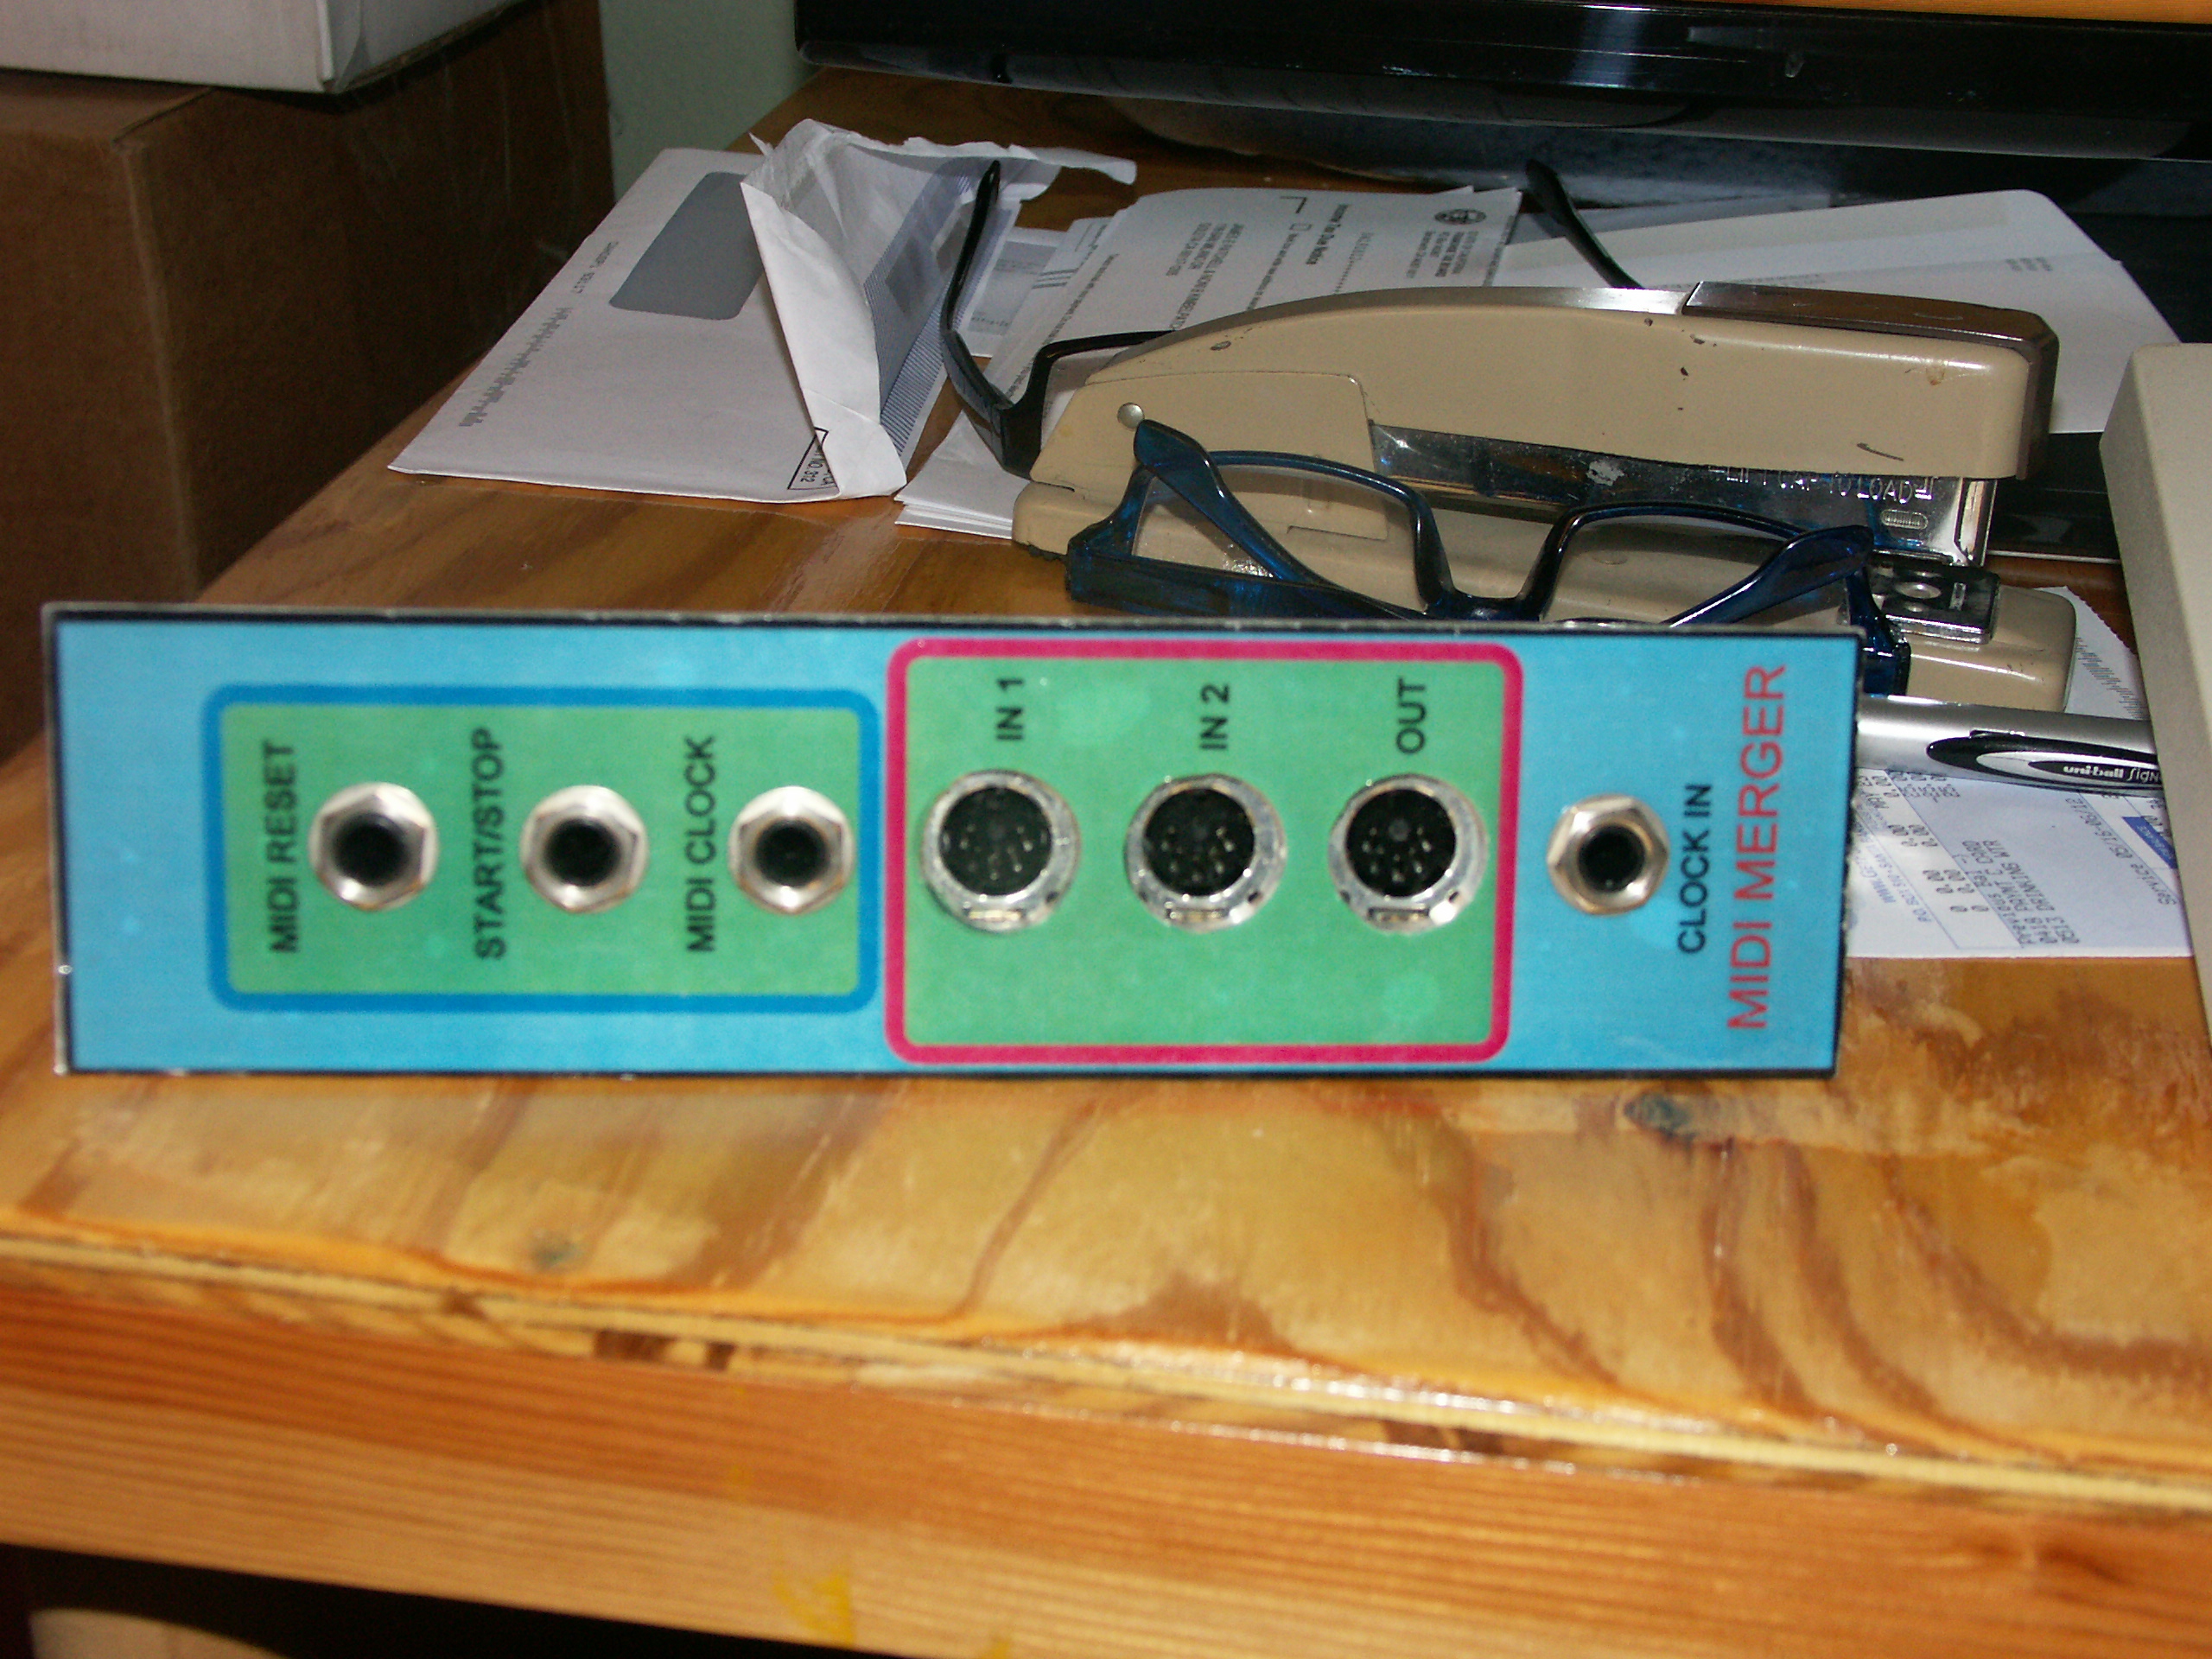
jacks and pots from going through. Finally, mount your board to
the panel. You are now the proud owner of a DIY panel that looks
like it was almost profesionally done.
Have fun.